Release news Naviate for Revit
Naviate Zero September Release 2023.1.6
Release notes for Naviate Zero. Highlights include the new features Settings, Apply Resource, Calculation Results and Export.
-
Update
-
Feature
-
Feature
-
Feature
-
Feature
Changes is available in version 2023.1.6
First version of Naviate Zero – Minimum Viable Product (MVP). The goal with Naviate Zero is to allow Revit users to make smart sustainable material selections in their models.
With Naviate Zero you have access to a library of EPDs (resources) from One Click LCA. You can search for EPDs and assign them to Types or Layers (Materials) in Types in your model.
You can at any time do a quick calculation of the CO2e for stages A1 to A3 (Cradle to Gate) and examine which building elements that has biggest impact on emissions.
It is also possible to export all assigned EPDs and quantities from the model to One Click LCA to perform a full life cycle analysis. You need a free One Click LCA user account to do the export. To perform an LCA you need a license for One Click LCA.

Login and startup changes to all applications
All Naviate 23.1.6 applications for Revit now uses your default browser for logging into Naviate. You still use your Symetri account and password as before; instead of getting a separate dialog box for entering your email and password your default browser is used.

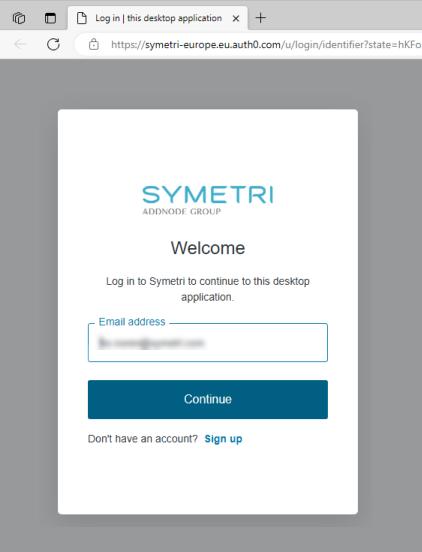
You can close the page after you have logged in.
You only need to update one of your Naviate applications to get the new login functionality but we recommend that you use latest released version of your applications.
New! Settings
Define where the building is located and what building elements (Revit Categories) to include.

The settings are saved in the project, and it is also possible to use the tool in a project template to configure default settings for new projects.
New! Apply Resources
Find resources (EPDs) from One Click LCA database and assign to building elements (Types or Materials on types) in your project.
Main features are:
- List all Types of chosen Categories in the project grouped by Category to assign resources (EPDs) to the Type
- List Materials used for a Type and assign resources to each Material
- List all Types in your project grouped by Material for assigning resources per Material
- List only used Types or all Types for assigning resources to Types in a project template
- Filter Types based on Category, Family Name or search string (Type Name)
- List only Types without a resource assigned to it to find Types added to the project after last calculation
- List Types for selected elements only for quick and easy assign of resources
- Highlights and selects elements for selected Type(s) in active View for better workflow
- Choose what Unit to use for each Type/Material for controlling the calculation
- Filter resources by Data source, Areas, Resource Category, Type, CO2e performance, Units or search string to find the resources you are looking for
- Automatic filtering on Resource Categories based on Revit Category to make it easier to find correct resources
- Apply a resource to Types or Materials
- Copy & Paste resources to other Types to speed up the process of assigning resources
- Remove resource from Type/Material
- See detailed information about a resource
The left side of the dialog box show Types or Materials from the model. The right side of the dialog box show resources (EPDs) from On Click LCA database.
Select (check) Types or Materials in the list to the left and find appropriate Resource in the list to the right and Apply it. Use text search, filters and/or Automatic Mapping to find appropiate resource. Hover over a row in the resource list to see the complete description or click in Details icon to see its properties.

If you start the tool with some elements pre-selected in Revit “Show Selected Only” is enabled and the Type list only show Types from the selection. Without pre-selection you see all Types in the project based on the Zero Project setting. You can switch between these two modes in the dialog box.
Click “arrow” on the left in the Type list to “open” a Type to specify resources for individual Materials on it.

Or switch to Group by Material to apply a resource to same Material on multiple Types.

You can also specify if you want to include unused Types or exclude Types that already have a resource assigned to it.

It is easy to see what Types you apply resources to since the elements are highlighted and selected in Revit when selecting rows in the list.

New! Calculation Results (CO2)
Get an overview of the CO2 emissions and what building elements have most impact (stage A1 to A3; cradle to gate).

When you do a calculation the tool also writes data to parameters on the Types and individual Elements.

A schedule is also created showing information for all types included in the calculation.

Note! You need to rerun the calculation to update the parameter values on the Types and Elements when you have made changes to the model or the assignment of resources.
New! Export
Export the project to One Click LCA to do a full LCA of the current stage of the project.
When you export, you are asked to sign in to One Click LCA. Register to get a free account if don’t have an account.

When you have signed in you can either download an Excel file with the export, send the data to another One Click LCA user or continue the import process if you have a valid license for that.
